Do you find your fridge is constantly packed with bulky plastic containers and bags of leftovers? Maybe it’s time you make an eco-friendly switch to beeswax wraps. Not only are these better for the environment, but they’re durable, liquid-tight, and easily moldable to any shape. Also, you can reuse these wraps over and over, and they couldn’t be simpler to make, so check out how to get started! Your fridge will feel like a breath of fresh air at every visit in no time.
Here’s What You’ll Need:
- Cosmetic-grade beeswax pellets
- Cotton fabric
- Parchment paper
- Pinking shears
- Paint Brush
- Baking sheet
- Ruler or tape measure
You might also like: Dessert For Breakfast: Overnight Oat Cookies
Instructions
- Begin by preheating your oven to 225 degrees Fahrenheit. While the heat cranks up, go ahead and pour 3-4 ounces of beeswax pellets into a bowl, as well as line your baking sheet with parchment paper.
- Next, grab your pinking shears, or an extremely sharp scissor and start cutting your fabric into squares. Make sure to include a few larger pieces for bigger containers, as well as 6″ x 6″ squares for small containers like mason jars. Also, pro-tip — if you have leftover cotton squares, perhaps from sewing or making a quilt, these are perfect to use, as long as they are a cotton blend.
- Now, it is time to add your fabric squares on top of your parchment paper-lined baking sheet. If you can fit multiple pieces at a time, go for it, but make sure none of the edges are touching. The fabric square should be laying pattern-side down.
- Here’s where the magic happens, as you will add the beeswax pellets, which are key to the entire project. Evenly distribute the pellets across the fabric square, and make sure you don’t overdo it. You can always add more, but an overload of beeswax will make a no-good wrap, and honestly, a sticky mess.
- Once your oven is ready, insert the baking sheet, allowing the pellets to melt. This should take about 6-8 minutes. Once finished, remove and grab your paintbrush to spread the melted beeswax quickly over the fabric. Also, make sure you don’t use too special of a brush, as once the beeswax is latched onto the bristles, there’s no getting it off.
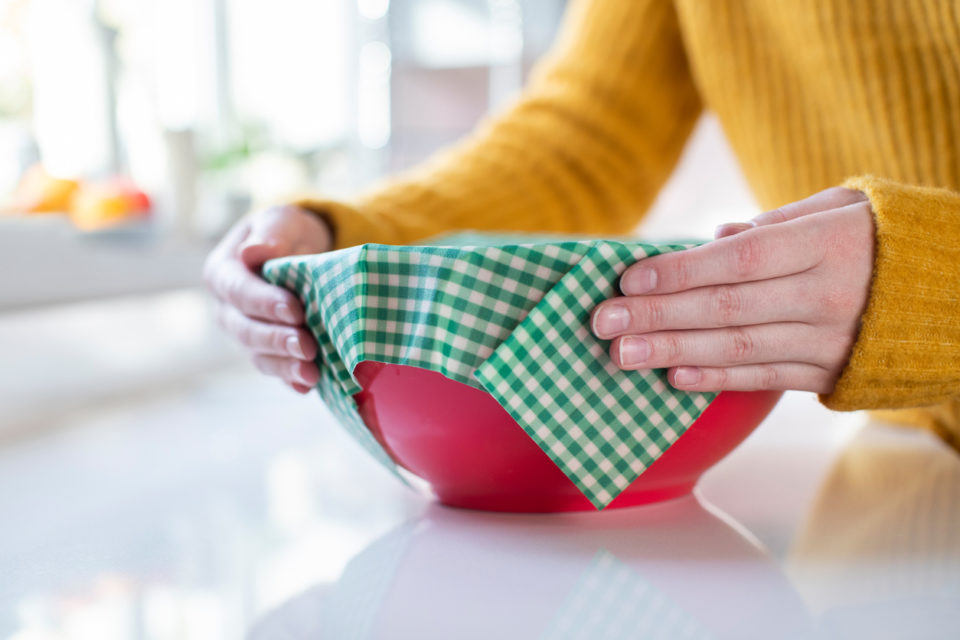
- Allow the fabric square to completely cool. Now, go green and start organizing your leftovers with this hack! To keep clean, simply rinse with warm water.
Now that your home has become more eco-friendly, what about your car? If you are searching for a Hybrid option, we have a ride for you at Walt Massey Chrysler Dodge Jeep RAM in Andalusia, Alabama.
Disclaimer: The stock image is being used for illustrative purposes only, and it is not a direct representation of the business, recipe, or activity listed. Any person depicted in the stock image is a model.